Total from 2020
1262 hr
2020 may have looked unproductive as a lot could had been completed,
though it was a very good year overall with only 216 hours applied to
the project which gave a very good start to other things that can be
worked on and hopefully completed this year.
- rear firewall / window trim and upper B-pillar plug was started last
year but will probably not start till early march when temperatures
start worming up so that plaster can dry up. may need to rethink seat
belt mounting as the original though will not work as expected.
- new headlights, plugs/parts for LED and HID housings
- Door, latches and other inner workings. Never got around to it in 2020
but that will be the focal point this year as its the last part of the
body.
- finalize HVAC bezel and inner baffle workings, May need
to locate some different heater and AC cores
- Fenders surrounding headlights and leading door sills and hinge
packets
- Any additional body or interior panel mounts
- Anything and everything else that needs to be done, rear upper spoiler
mechanism
Jan 9 1.5hr
Not a better time and need to move on. When out today to work on
the headlights. Figured out a different way to do the LED housing but
will need to do it next time. Will basically make a form around the
projectors to slip on easily and pour plaster in around it rather then
trying to carve it out.
Added surface for small projector on right side and bonded main
projector mounting for left HID housings.
March 10
46hr
Well its been 2 months and not much has happened. I guess
the gloomy sky and short days are not very motivating to get out and
do any work and thought would do some other work inside the house
but... again.. not much had happened. Well maybe should not go
that far. Did some PCB layout for instrument cluster and came around
to 2 or 3 processors that still need to pull final decision on for
running it. More immortally laid out and manufactured few break-out
PCBs for processors and CAN drivers to test out and figure out codes
from the wheel combination stalk.
Having second thoughts about the interior fuse box and how its laid
out and its co-existence with one in engine bay. Not really a
problem with the engine bay going to the back of the car but more of
feeding headlights from it being in the back. Any hoo will have to
ponder and figure something out as it will require additional 6
fuses coming from somewhere. Problem is that the Acura/Honda
engine bay fuse box if really mother f....in ugly. maybe
something from other models as the controller will have to be redone
anyway.
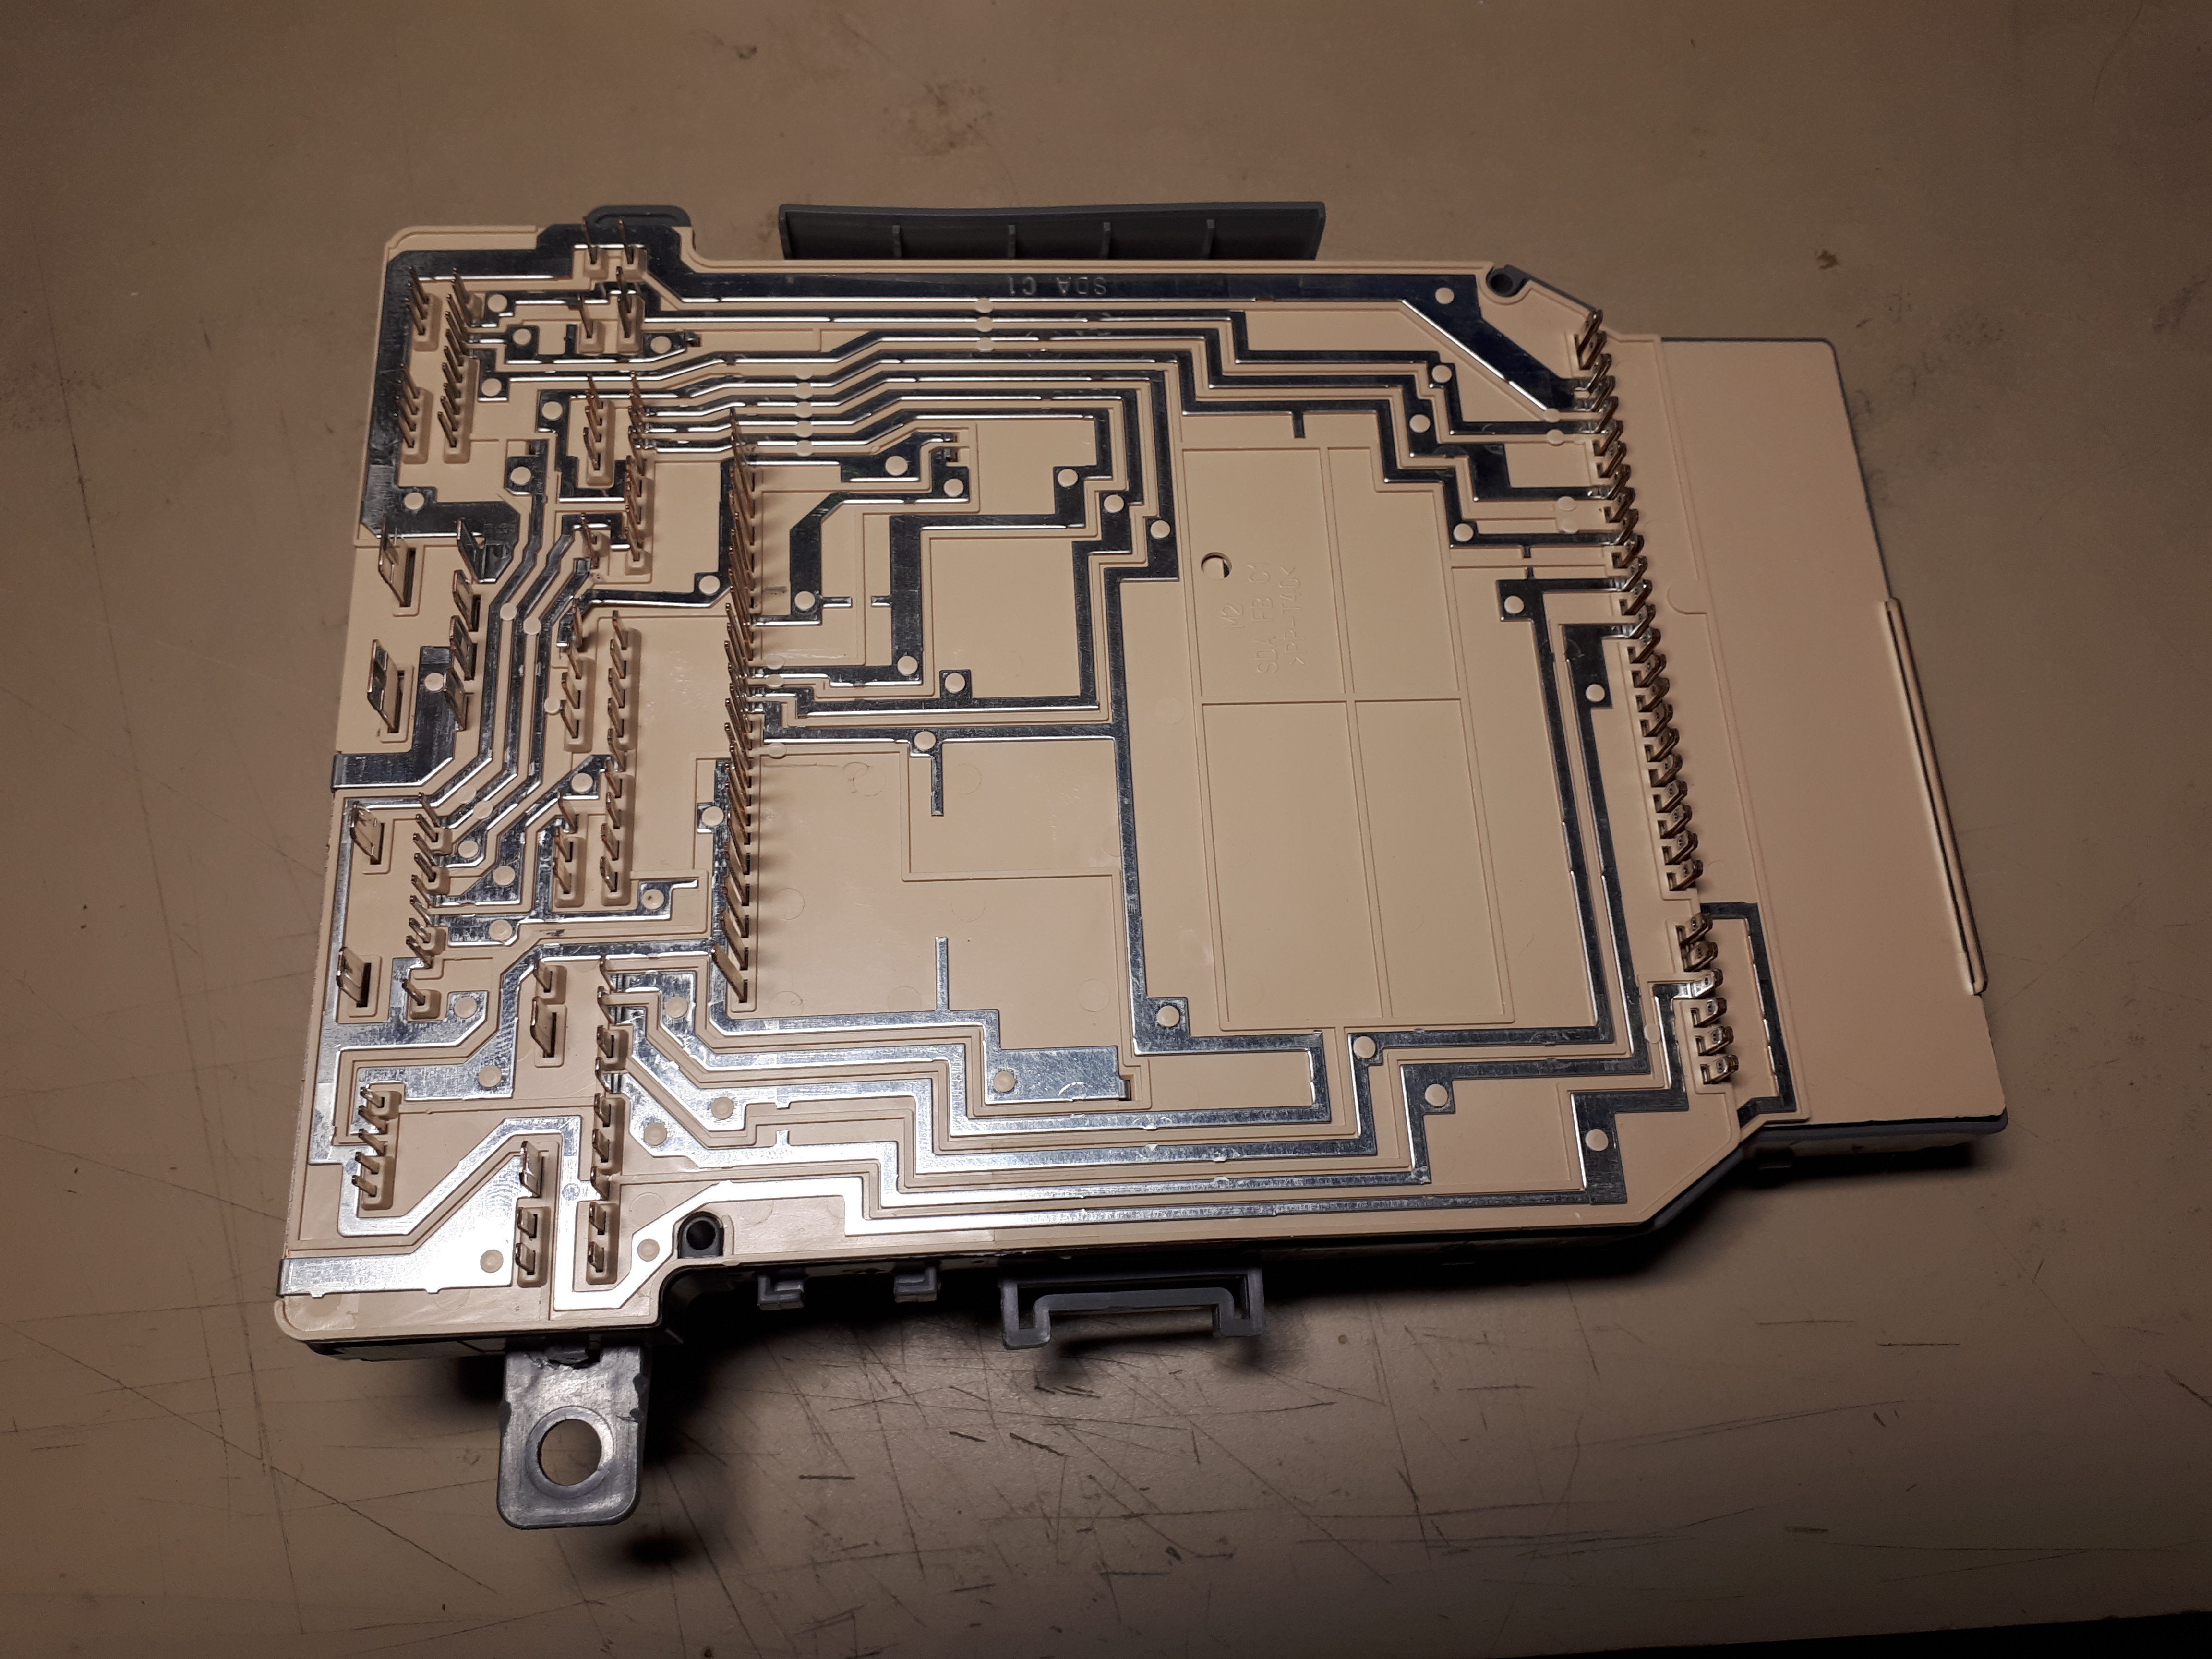
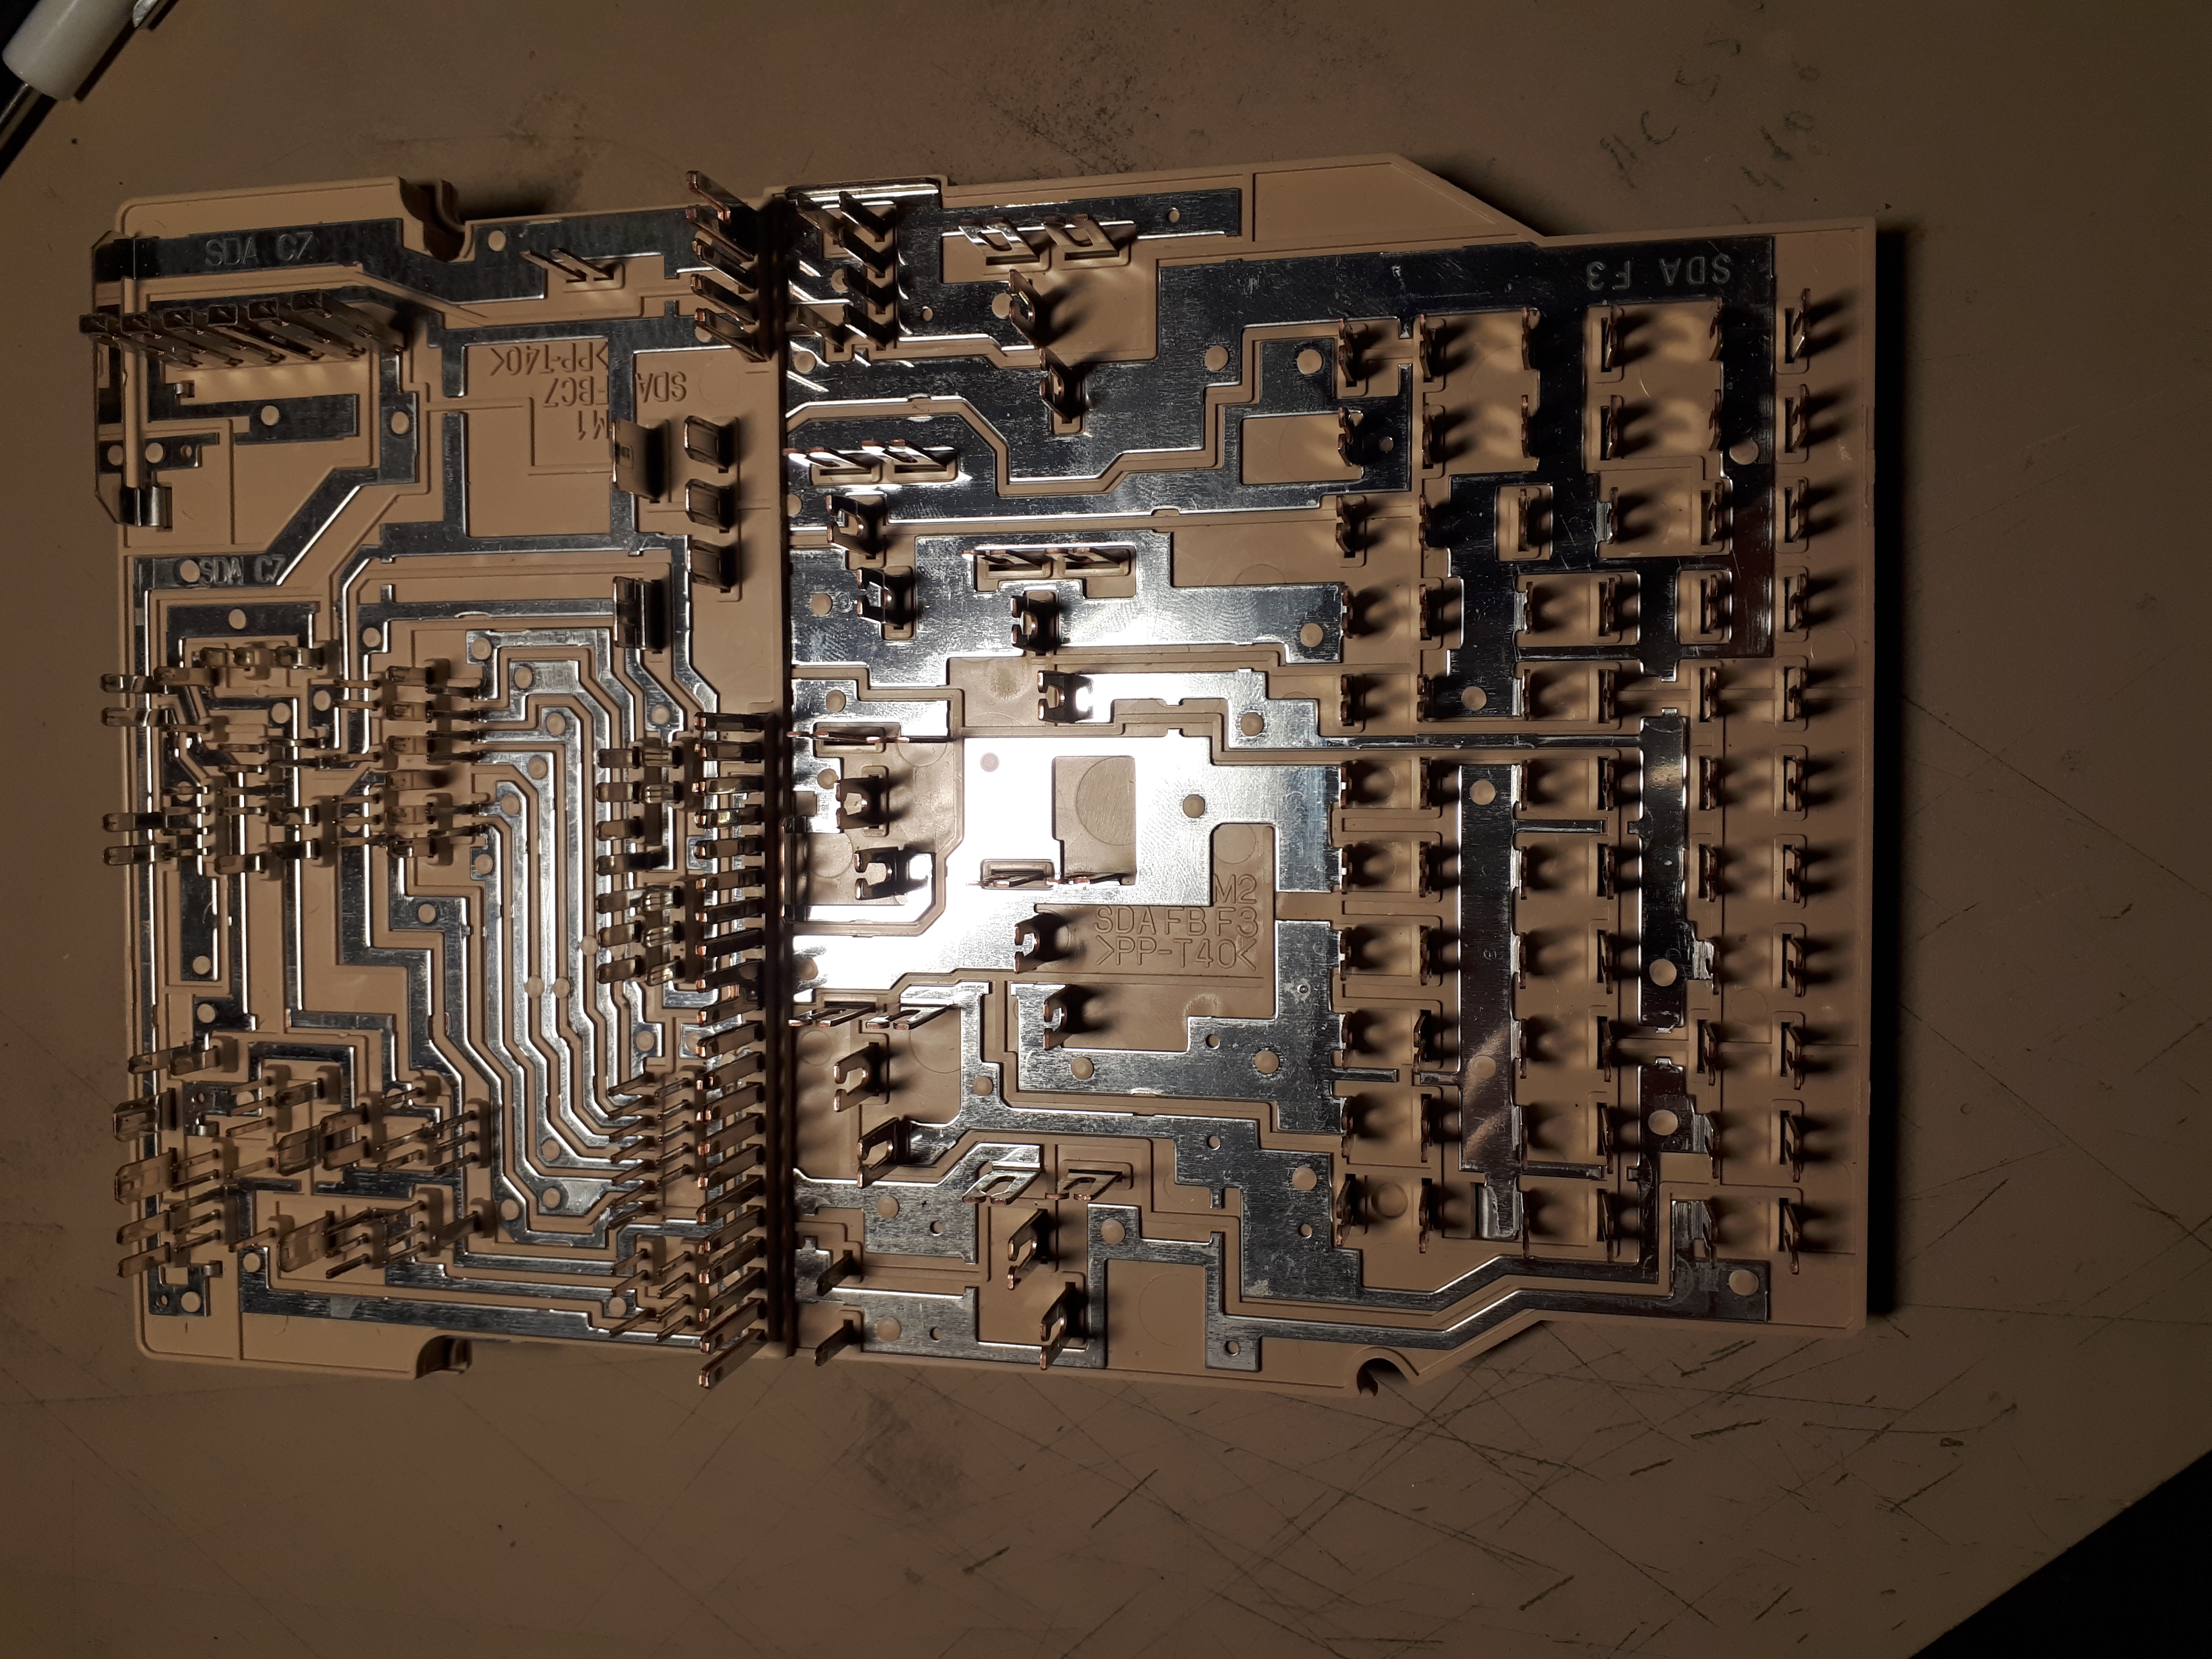
Last couple got the reverse internal wiring done of the MICU.
 Figured to approach it in a bit different way. With all of the
connectors and pins, though to my self would it nice to be able to
hover a pin and show other pins that are linked together, so while
laying out PCB had IRECA moment as laying out traces. Use it to draw
the connectors and pins and label them with a net name so hovering a
cursor over a pin would light up other pins with same net name.
After 3 nights got the main MICU interior connections figured out.
This will now make the modifications to the controller board so much
easier rewiring some of the wire paths.
Figured to approach it in a bit different way. With all of the
connectors and pins, though to my self would it nice to be able to
hover a pin and show other pins that are linked together, so while
laying out PCB had IRECA moment as laying out traces. Use it to draw
the connectors and pins and label them with a net name so hovering a
cursor over a pin would light up other pins with same net name.
After 3 nights got the main MICU interior connections figured out.
This will now make the modifications to the controller board so much
easier rewiring some of the wire paths.
Over maybe the last 2 months was not completely wasted just one huge
update. Now just
need to focus on headlights housings and try to decode the stalk CAN
signals
April 7
A month had passed and no progress. However with Covid-19 stay at
home orders and lockdown decided to get some materials for plugs.
Picked up 2 bags of plaster and few cans of primer so hopefully that
will be sufficient to finish rear upper firewall panel and get the
headlight housing done. Its starting to warm up so need to move on
it.
April 9 0.5hr
carved and trimmed a bit of right light housing and filled in top of
the projector opening
April 10 2.5hr
Trimmed back exes from right housing, carved out left housing after
marking it to make it symmetrical and build up extra for projector
mounting.
Noticed that the openings are of different size compared to the
rings so their shape will need to be adjusted
April 13 1.5hr
Got the LED housings trimmed from some of the over flow and worked
more on the lect housing more to catch up to the right side. Did a
quick measurement between the new HID and LED housing. What it looks
like they will be very similar in height so to prove it and since
larger projector hole was already cut, got the projector wrapped to
make cone and filled in around it thus further building up the
housing. Will trim it and see how it will compare it to LED.
Will also need to do the smaller projector hole made and build it up
just like the larger one. Also build up some of the lower
areas on the LED housings as they still need lots of build up
April 18 1.5hr
Focusing on the HID headlight housing plug as that will guide the
shape of the LED projector housing, provided that they will not be
too tall.
Shaped right housing around main projector, however looking at it
came a thought that it might be pointing too high up rather them the
ground (road) so will need to test that theory by mounting the
projector and powering it up to see how the bean hits the ground.
Never the les its roughly shaped also cut down on the height of it.
Got the second hole cut out for for smaller projector however after
cutting out left and comparing to the right decided not to start on
the trim ring. So after some remeasuring and reconsideration decided
to make just the main ring on the left main projector. Will need to
wait for that to cure trim it and try the light beam projection test
before moving forward
April 22 10hr
Got around at looking at the prototype of LED board for break
splitter where it burned up some of the LEDs for some odd reason. It
turned out that the center thermal pad is connected differently
between orange and white LED's, so removed the link going to cathode
and they are free floating now. After removing offending links on
one of the proto boards, build it up and it works perfectly with
less then 100mA consumed by white LEDs. Updated PCB layout in case
needed to have some extra made and production will get those as
well.
Finished controller board which is part 2 of the setup. Back of LED
board will solder up to it and make it a single unit that can be
mounted in the splitter it self. This is white / amber setup and the
controller can be configured to to be white marker with blinking
amber and optional shutdown of white while amber is on. OR white
marker with sequencing amber and optional shutdown of white to
enhance the amber turn signal.
Sent out controller board for printing and will assemble couple once
they arrive.
April 24 2hr
got the left headlight trimmed and after looking at left and right
decided to alter left to how the right looks like. So got some tools
and started carving extra material and removed any thing that
interfered to make it symmetrical to right side.
Trimmed some more of the right housing to see how it would fit into
the fender. If it was not for the fact that the main projector is
huge and is moved forward quite a bit. Top id it sticks up more then
wanted.
Got a cone made for the smaller projector and got the 2 projectors
fitted back into the bases. Also fixed in the flat mount on left
housing as it fell off
April 25
quickly pulled off the projectors from housings. Knew that the
material was starting to thicken up while doing the smaller one. So
back it if had some voids. so before pulling the cone out mixed some
small filler and filled in the void very quickly.
May 2 1hr
Continued on with headlight housing trimming. Both are hard to make
fitting of, HID is high on main projector and will have to extend
backwards so that lens can have reasonable flat curvature. LED are
wide and protruding out words. Have this feeling this is going
to be a PITA to get something universal. Had to cut it short cause
needed to get out to town.
May 3 2hr
having to make short day yesterday and probably good that it did.
Had to think about it for a bit. lens will never be exactly smooth
to the fender/bumper and will have to have some sort of protrusions
but they will be minor. Never the less starting to get common flow
between both housings and it might be OK with the space that
there is to work with. Need to re-adjust how the housings sit and
move them bit inwards to the center so that will gain bit of space
on the outer side which will allow for smoother edge. if that is
fixed then everything should be nice and smooth to fender. Duing so
will need to adjust some of the bumper and fender cut line which
should actually have nicer flow.
Re-shaped slightly right housings and made templates to transfer to
left side. Trimmed left housings based on templates. Unfortunetaly
trimming left LED housing had it cracked as there was not enough
upper material to hold it together, not a major crack but just
enought to get you going. Also trimmed HID housing and made hole for
auxilary projector, set it into place building up the ring and
filled in couple other small surfaces on right projectors.
Used wood glue to bond the left LED projector but will need to get
that trimmed and filled to pair up with right one.
Slowly but surely, once the wet days are over hopefully will have
something to mold and made parts of soon. Then on to the rest of the
pieces,
Should start doing something on the rear firewall trim and lower
panels
May 4 1hr
trimmed the small projector ring on left housing. Those projector
covers will need to have some shaping done to them as they are quite
thick. Will need to move those housings inward and try to adjust
horizontal position and see how parallel they are to each other
before proceeding any further in having them shaped.
May 8 2.5hr
spent long time adjusting fender and both headlight versions to fit
in. Think got it to a point where they will be interchangeable
utilizing same fender cut outs and chassis mounting points.
May 9 2.5hr
Changed focus today and decided to look at quarter panel alignment /
mounting as reason to have rear firewall panel moving forward of
having plug made. In order to do that had to remove any mounted
panel bolted to the chassis. So having the quarter panels just
sitting on the chassis with one bolt loosely holding by very rear,
it seams that they align with the rockers problem is that they are
pushed out too far outward and the 2 right mount weld troughs are
placed in incorrect location by about quarter of an inch. AHHHH. So
came the dilemma re-drill the panels and fix the holes plus any
offsets or remove the weld through chassis nuts and put them in the
correct location. Alter looking and contemplating decoded to do the
right thing and remove what's there and put new ones in correct
location. Figured if doing it may as do it properly. Left side will
just have to have it drilled and welded in proper location. Problem
2 now is that the upper rails will need to be relocated as well by
moving them inwards so that hinges would mount up as it looks like
they need to move around half of an inch. Other thing is that roof
may need to be possibly narrowed though as it needs to be redone
that may not be a big of a deal. Same may apply to the engine lid
though that will be just a matter of trimming sides.
Positive side of this all is that quarters will mount right against
chassis as they where meant to be, no filler panels just fiber
filler from panel to chassis tube as it was meant and everything
will be water sealed.
Other good news is that the break trim light controller board
prototypes came in. need to components to arrive in order to get one
assembled
May 10 1.5hr
Assembled all of the passive components onto the controller board
that had on hand. Waiting for some P-mosfet drivers and come
rectifier diodes. Good thing that there is only 2 to be assembled
cause those 0805 resistors are small, in hind side should have gone
with 1206 as they are bit bigger. May try to redo the layout to see
how it will fit. Also assembled second LED car after cutting traces
from cathodes to the center pad
May 15 1.5 hr
Continuing on with the quarter panels. After removing the threaded
weldin captive nuts last week, they had to be re-drilled or
elongated / slightly moved over to have new sets welded in on the
right side. New nuts where welded in and ground to finish of the
surfaces then primed to protect metal from corrosion.
May 16 3.5hr
Continued on with left quarter. Drilled holed in panel and frame
after having it aligned with right, welded in threaded weld in nuts.
This makes the quarters aligned and mounted with one exception, the
upper tube that's is used to hold deck hinges and is support for the
quarter panels needs to be moved inwards by half inch. Had one of
the tubes moved outwards last year cause noticed that they where not
placed evenly :(( so this will be re-do of re-do. Having quarters in
this location they align better on the split to the rocker panels,
secondly they mate smooth around striker location / door seal
which is a major thing when making cabin water tight.
Couple side effects of pushing quarters inwards. Engine lid is too
wide now by close to 3/8 of an inch on each side depending on gap.
Secondly hinge mounts will need to be adjusted to accommodate for
the change quarter panel mounting. And lastly, roof panel, have not
measured it yet but it may need to be narrowed as well.
Either way good progress or creation of more work or re-do
May 24 2.5 hr
long weekend but had other things to do and just got on to the
project. Had intension of doing headlights but never got to it and
just did the back firewall interior panel. Never the less put some
filler material so that filler would not go into cavities. Had to
pull all of the outer edges around the panel as they are
considerably off comparing to the lower B part, carved out some
extra backing foam so that the filler hopefully would have some
extra bonding area. Built up all of the outer areas out of filler.
the thing is that it will be heavy and tight so taking the panel out
will be tricky. However as the quarters now have a resting
place tolerances will be tight and close to the final dimensions and
will finaly be able to finish that panel.
May 25 1.5hr
removed all of the quarter panel screws, moved it outwards and up a
bit. The panel is heavy and tights as predicted. While taking
out it split in half :( ahhh so will need to bond it back together.
The other thing is that cause its so tight the outer fillings are
showing some cracks so fill need to figure out a way to keep them
bonded together before they completely brake off. AHHHH
Should have completely removed the quarter panels, guess that's what
happens when you rush things.
So once day job finished, took another look at the panel. Left side
broken off into smaller piece and survived however the Right side is
2 3rds and is the one that actually cracked the add on material.
Trimmed both sides to give way of better fit while test fitting but
unfortunately right side just did not had the grip to hold it all
together and trying to hold it in place proved to be futile.
Anyway carved away extra material on both parts and removed foam
backing on the main part. On left side embedded mesh and bonded the
new material with flat part on half of the edge. Once cures will
carve out remaining portion and reinforce remaining edge. Right
side, since it was not possible to hold the material in place
properly. Had to discard it and just embedded part of mesh strip on
back side and remaining part will be embedded into new part once
laid up again. However contemplating to bond the 2 parts together
first to make it hole. So unfortunately this will delay in
making any progress on the plug
May 27, 2.0hr
Had couple of days to ponder how to bond the back firewall plug
quickly but making sure its still solid and decided on 2 step
process. As the panel is based on 2" foam board the first step is
from back side as it provides best place to straighten it and then
from the front. So carved out 2 channels on the back first all the
way across just under window ledge down to the surface coat and a
second channel on bottom to further reinforce the edge which will
also re-bond some of the chipping filler roughly 10" long. Might
extend the lower channel further and perhaps all the way to the
edges but for now that will suffice. Now to keep everything straight
and together a solid steel rod would probably be best though as all
stores are closed due to Covid-19 came out with the idea of using
nylon mesh as best option. It would get embedded with in filler and
the filler would bond to the filler used on surface which will give
a solid thick bar. Thinking about it should have glued on some of
that nylon mesh on back side and embed some on the front when first
making the panel. As a matter of fact should have done that on all
large panels that tended to sink down especially on the rear deck
lid. Second part will be to do similar thing on front side, but as
its really flat and like to preserve its shape may need to do the
reinforcement in 2 steps and while positioned in the car while
remaking the right side. Will sand down a channel on the surface
across from side to side for stability of entire panel then make a
channel on the crack and again embed some of that nylon mesh in the
filler which will prevent bending the other way. Once all of that is
done the panel will be removed and let it sit aside to cure before
doing any shaping on it
May 28, 2.5hr
Continued on the rear firewall panel, put some additional filler to
prevent filler from sticking to chassis and fitted panel in place.
Sanded down valley on face and filled it in with embedded mesh
suspended in the filler. Build right side embedding the mesh tamps
that where fastened previous day. Will need to have it dried before
taking it out. at least remove quarters so that the panel will lift
out easier. Will most likely have to wait a week so that the
moisture will evaporate as its very wet from yesterday.
May 29, 0.5hr
pulled quarter panels off and pulled the panel out, Shaved some of
the over stuffed filler and put it aside to dry.
May 30, 1.5hr
Took out the rear panel out into sun in hopes to cure. went out
later in the day to work on headlights, however while opening the
doors forgot that the panel was propped against one of them. So
instead of working on headlights ended up fixing cracks on the
panel. AHHHH. Well at least the right side surface is getting
re-bonded.
June 2, 2hr
Got the rear firewall plug in after some trimming and shaped right
inner contour. Filled in some gaps on right side and a hole that was
made after trimming as it seems it was made too thin. Re-skimmed the
large hole after embedding mesh in.
Adjusted and centered HID headlights. Had to move right side inward
1/4 inch. build up upper inner rim so that seal can sit on it. It is
right against fender now but will have to trim it down so that
gasket can be fitted in.
June 6, 2hr
Further shaped HID headlights, keeping on forgetting that the fender
is not changing and trying to keep same profile of it. Though it
will rise by about half inch and need to keep that in mind. Got the
cut out shape to ideal shape and position. Shaped the housing
further also got the LED to similar shape that it will fit same
opening so they will be interchangeable. Further filled in back
firewall and it looks like its flat yet again so will need to work
on it trying to get it to shape. Will have to get remaining mounting
tabs done and welded / bolted to all of interior panels. Will have
to think about mounting of roof panel too.
June 7, 1hr
When out for a quick look to check on the headlights. knew that the
extension behind mounting face was way off so decided to build some
of it up and correct angle of it. Embedded some nylon mesh into it
so hopefully it will hold it together better and even if its off
will be able to add it later so that it will span across the width.
Doing one side only at the moment of both HID and LED housings as
there is no point doing both sides incase would need to do major
redo on the design. One thing though is that some of the areas on
either housing are rather thin hoping that will not run into an
issue where it will be impossible to cast. Time will tell and
hopefully will try to make them bit thicker
June 8, 1.5hr
Spent good time shaping and carving the 2 right HID and LED light
housings, got them to a point where they are very similar in fender
opening shape. Still rather malleable and prone to easy breaking so
will wait another day and hopefully they will be in good shape to
further shape them. Very happy on how they are coming out even
though the fender needs to be slightly altered to provide some of
that needed space for the height of HID projectors. There will be a
very thin inner upper corner and will try to somehow make it thicker
for easier casting but will have to see how the final work will come
to. Additional spot will be with LED inner vertical side.
Will focus on the outer shape of the housings for time being and be
closer to getting the fender reworked and completed.
A lot more work needs to be done around back firewall panel in order
to get it to mold stage which would leave just the lower back
covers before floors can be welded in
June 12 3hr
Contoured and sanded flat back firewall plug. Trimmed left HID
headlight. Skimmed back firewall plug and build up extension on left
HID headlight housing.
June 13 2hr
found that the thickness around the very top glass and roof of the
back firewall trim is not same from left and right, got that shaved
to same thicknesses. I assume that was caused by the crack of the
back panel. Trimmed further right LED head light so that the
projectors will slip in easier. Debating of making metal mounting
bracket rather then having them mounted directly to the housing.
Need to do the left one and build it up. had to build up left HID
housing further but unfortunetaly cracked the extension so will see
how it will hold up when it dries.
June 19 3.5hr
shaped back outer edges of rear firewall trim. Shaped further
headlights, build up left LED housing
June 28 1hr
Did some trimming of left LED headlight.
July 4 3hr
Trimmed left HID headlight, HOWEVER. looking at the piece of left
fender it was decided that it is warped and it will be hard to use
it as means of proper measure. SO took a big jump and cut out
headlight openings in the fenders.
July 7 2.5hr
Had some time to think about the lights and came out again to have a
look at them. It ended up to be a simple problem of clearance, glad
had the time to take a break and not have done something stupid.
So trimmed of some of the housing which resolved clearance issue
making the fender sat down properly. Looking at it further it maybe
best to have the fender pushed out to the sides as well not just the
top. Build up top and outer sides of the left housing as they where
sunken in slightly. Had to also build up back right bumper cut out
to match left side while building up left housing.
Removed back firewall plug, however right lower corner broke off,
had to bond it reinforcing it with fiber mesh. With the plug out
used the paper as separator and build out rough right speaker box.
Will need to get final top surface before removing it.
July 9 0.5hr
Squeezed bit of time in while doing brake job on wifes daily
driver. Top coated surface of the right speaker box and
build-up/extended top and bottom of the box so that it would reach
fully to the bottom of the floor and bottom of upper panel.
July 14 0.5hr
Parted left side speaker box and laid up first layer of mold
plaster.
July 15 1.5hr
Build up left speaker box to point where top layer will need to be
shaped with thicker bottom edge around the floor. However decided to
leave it to next day to finish top coating and have the main
structure set up to avoid possible damage to it.
Shaped some of the surface of the right box, but will need to figure
out a way to mount it in place some how now that its pulled of to
finalize all of the dimensions. Need to wait for left box to be
pulled off to get some mounting figured out. Also will need to put
the upper panel back in to figure out bottom edge and return to the
storage compartment for a clean finish.
One thing that is high on priority are the fenders and headlight
situation regarding their general shape/fit and mounting. Need to
get that knocked out soon so other items on the list can be worked
on.
July 16 1hr
Surface leveled most of left speaker box with exception of clamps
holding back on the center tunnel cover. Will remove it next day to
let it cure but hopefully it will not peal off and will be able to
fill in the holes first occupied by the C clamps. Trimmed area
around right headlight.
July 17 5hr
got out late however managed to put some solid hours in though the
work does not show the effort. Pulled left speaker box, however how
it was build bottom part around C clam cracked while removing it.
However as this needed to be reinforced after take out that was
easily fixed by backfilling from center of cavity.
Now that the tunnel was free it was removed attention was put
towards ways of mounting it to back firewall and how the speaker
boxes where going to be mounted as well. Figured a best way would be
to use either screws of bolts from inside of storage cavities with
additional screws holding it agains sides of tunnel trim. After
making some templates to reinforce sheet metal and having it welded
in. A lot of time was spent to clean off rear panels of tunnel as it
seems they never where primed. Day ended after primer was applied to
all cleaned up metal as to prevent it from any dust settling on the
paint.
July 18 7.5hr
managed to put some good hours into the car today. not the proper
mounting bolts but never the less used some screws and bolted center
tunnel into the rear firewall. With it mounted its now possible to
work on the speaker boxes and upper rear firewall trim. A huge
amount of time was spent on getting bottom of the upper rear trim
straight. had to remove some of the foam structure to clear
frame tube which was covered by filler to make hard surface. Got the
speaker boxed shaved to level, seem like when did them other day
they where protruding too far forward so had to shave them. Also
trimmed inner wall and top to mate with the upper panel. Used couple
layers of 1/8 cardboard as spacers when back filling speaker boxes.
That space will be filled with upholstery later on when finishing
off. Also re-skimmed surface of the speaker boxes.
Will have to get cutout of 6x9 speaker and fit it onto the face to
make indentation so that the speaker will sit flush. Last thing will
be a flat panel all the way across to cover the cavity and speaker
box to make it look as if there is no storage cavity.
Will need to wait few days for all the pieces to dry off before
doing any sanding or any other work on them. Will need also add
return that will hold carper in the storage cavity but that will be
the last thing before making molds
July 19 1.5 hr
Quick look at the speaker plugs, trimmed, cleaned up and sanded flat
build up some corners to make them symmetrical and sharp. Tried
lining up 6x9 speakers, they fit but will need another half
inch to make some returns and provide some area for grill to fit on
top and not having anything exposed on side edge.
July 24 1hr
Quick adjustment of speaker boxes trying to get them squared and
symmetrical between left and right
resurfaced and filled in some areas
July 27 2.5hr
had an itch so decided to head out to garage. sanded down some rough
spots on the speaker boxes and flattened speaker face. Still mulling
about it but may try to sunk in the speaker mount face about 3/8 or
half inch and move it inwards so that would not have to enlarge the
box any further unless will put 5x7 rather 6x9 speakers. Scribed
upper panel of how much bottom lip will need to be sanded down so
that the bottom filler panel will sit flash with it.. Probably will
have to redo it but decided to trim out rear window to contour of
the rear deck lid. So one last thing to work out are the upper
seatbelt mount points and how they will be fed through the panel.
One that is completed will prep the plug and pull mold from it.
Resurfaced speaker boxes fixing some of the corners and filled in
around the window and try to get it smooth
July 29 3hr
cleaned up lower lip on rear firewall panel making it symmetrical
left to right. Build up more of a slope so it would not look too
sharp. Will have to carve out indentation on outer edges to mount
seat belt loop.
Sanded down speaker boxes and extended bottom so it would not
require any flaps when making molds. they still have some work to be
done before being ready. Have to carve out recess to mount speakers
in making them flush with finish panel.
Changed direction some and decided to look into HVAC blower box as
it was sitting since last year and figured should finish it so it
would be ready for mold making. Thought of making a lip around the
motor mount to seal better as OEM but after thinking some thought
just using an O-ring like gasket to seal it and it would be much
easier to make the opening and making the mold and part. carved out
clearances so it would clear chassis trimmed part around radio for
wires to pass through and into fuse box. Sloped some edges for
easier removal from mold. filled in holes after foam removal
July 30 2.5hr
Started with HVAC blower box, sanded down the filler and primed it.
Few dings here and thereto be filled and it will me ready for molds.
Decided to go with 6x9 speakers after looking around and realizing
that they need to sit 3/4' below surface and with the grill right at
the edge means some small part will intrude into the resting block
on the center tunnel. Good part is that the cut out will not be
necessary if the grill would be omitted as the speaker it self would
slide under the resting block.
Got some carving tools out and carved out 3/4 inch + deep cavity.
Did a first rough fill injust to get some solid surface to work with
Aug 1 1hr
Unbelievable... its already August. Doors are not mounted yet, glass
is not fitted and have not done any body work yet. Really need to
get my rear in gear and get the door fitted and get any mechanical
stuff done and move on to the body. Though there are lingering
headlights and the fenders to contend with so they need to be done
too at least figure out how much in any those fenders need to be
altered.
Any way, got out for a short time to clean up those recesses on
speaker boxes and filled them in so they are getting closer to be
ready for molds which will ultimately leave just the cover panel
which should be really quick job. Now thinking about it should the
resting piece up on top be part of the panel or something be molded
into the upper panel. Something to mull it over and if it
would be part of the panel then speaker boxes would need indentation
hummm...
Aug 4 1hr
Spent some time again on sanding down speaker boxes and HVAC blower
box. Filled in some indentations.
Aug 5 0.5hr
A quick sanding just to get rid of poky corners and a heavy coat of
primer on speaker boxes and HVAC blower box. Though thinking of
cutting down on some of the corners on the blower box to give ways
for extra space for like electrical splice connectors etc...
Thought of a way of getting seatbelt upper mount mounted will have
to see how it will work next time out
Aug 7 6hr
did not felt like doing any thing and it supposed to be a quick
outing to garage but ended up spending a lot more time then planned,
maybe its the fact that did not see too much progress with the car.
Marked down edges of lower B and speaker boxes mating spots on
bottom of rear firewall panel while having chance doing it and will
most likely proceed with finalizing the panel for mold making as it
is large and dont want to have it cracked. Also working on adding
extra frame to complete seat belt mounting tubes will most likely
inter fear with the plug construction. Will have to figure out final
upper loop area after figuring out how the loop will be mounted.
Most likely the part will have to be altered.
After sanding down the primer on the speaker boxes and blower HVAC
box plugs, skim coated them to get it to mirror finish before
making molds. Still have to look into carving out any extra parts
out of the blower box and ducting options for fresh and recycled air
baffle and how it will work in general.
With the easy part done focus turned into the frame and seat belt.
Added extra tubes after having them cut bend and welded back
together before welding it onto the chassis. this part of the
process turned out much longer then anticipated but glad its done.
Still have to add some extra material to finish it off but will have
to look into roof mounting as the area will be used for the mounting
of sorts. Will have to dig up the seat belts out next time to see
how the loop will mount and routing of the belt will go but it looks
like it will be bit lower then shoulder height and there may not be
any adjustment for it.
Aug 8 1.5hr
took longer then expected for what it was, never the less sanded
down speaker boxes and HVAC blower box with 220 grid and applied 2
heavy primer coats. Still will have to fix back side return but the
plugs will be ready after the sanding for mold making
Aug 9 3hr
spend another few hours on reverse engineering interior fuse box.
getting closer to getting it figuring it out though most likely will
not use everything that was in it and will have to remap few
circuits
Aug 10 2hr
Went back to decoding further interior harness while the plugs are
drying
Aug 11 4hr
More time on the interior wire harness,
Aug 12 3.5hr
More work on the harness. Thinking since having an extra key wire
set. thinking of wiring it up to what its going to be and cleaning
up some wires out of the loom. Maybe will head out and get another
one as extra to work on and have extra wires in case some will need
to be extended.
Aug 13 0.5hr
Its has been couple of days since the plugs had been sprayed so the
primer had should be fully cured. Sanded down the HVAC blower and
the 2 speaker boxes. Working on the wiring last few days made me
thing of finding more space for the wiring as there will need to be
at least one splice block so perhaps the blower box will have to be
trimmed to as much as possible. Also looking at the speaker boxes
the way they are made and upholstery in the storage boxes. Thinking
of bumping out one side so that the carpeting would go under it
making a nice clean finish. So as this would need additional 1/4 3/8
inch may as well go all the way up to the front and make a clean
edge around the cut out for the speakers.
Aug 14 1.5 hr
Was not planning but as was out doing yard work figured to stop by
and have a looksee, well it turned out to be fairly productive short
stop. Filled in some corner chips and inner corner on speaker boxes.
Should have squared off outer corner as it will be bit harder after
extension is added now that adding 1/4 inch will not be big of a
deal. Will also add small just as much to the upper panel on bottom
around the storage box. Filled in bottom of upper rear panel to get
any larger voids and chips out. also filled/build up area around the
center console on the rear panel to add to the strengthens of it.
Made 1/4 inch panel of filler which will be sliced and used as
the thickness addition to the speaker boxes
Aug 15 1hr
Quick trip to garage, extended or moved out the outer edge of
speaker boxes after slicing the 1/4 inch flat piece for both sides.
Still debating on the HVAC fan box if I should have the corner
trimmed to get some extra space. Also added extra piece of the 1/4
inch flat piece to extend around the storage area to hold upholstery
up.
Aug 17 1hr
Short time out again, sanded down any large bumps on the speaker
boxes and resurfaced hopefully will not take too much time to make
them flat again. Built up storage compartment edge and rest area for
cover to sit against it.
Aug 22 3.5hr
Not sure if looking for parts counts never the less its part of the
total. looked for set belt retractors and rear window regulator to
make up the wet wall and see how the mount point for the upper loop
will work. Had some creative insight to the HID head lights and how
close the inner larger projector is to the edge. Thought of having
it moved out slightly which would push everything out to the sides
and the smaller projector still would be flush to the lens. Have to
have another look but it looks like thats the solution to the
very non existing edge around the larger projector
Sanded upper rear panel mold and the 2 speaker boxed and had them
primed.
Aug 24 4.5hr
Few small trips to garage today working on the plugs. Sanded and
build up speaker boxes and got them to condition where they where
primed and ready for final sanding. Will need to have the primer
cure for a day or 2 and have some of the sharp edges softened so
they would be ready for molds. Got the edging around center console
worked out along with apholsterly retaining edge. Got it filled and
sanded to fairly smooth surface though it will still need some work
done to it to get it glass smooth. Also need to look into upper belt
loop as that will be the one are that will hold of making a mold.
Not sure about the roof mount. may need to bup it out or just will
take the chance to have it be way it is. other area is around the
glass, not sure if it needs extra build up though it will require
some cavity filling.
Lastly, HVAC blower box. Decided to trim it down around wire routing
after verifying its fit.
Extended or rather added extra material on the inner edge of HID
housings effectively moving them outwards by 3/4 of inch. this will
allow of extra gap from edge of housing lens to projector to allow
for smoother transition. May add some thinckness on back of smaller
outer projector to move it backwards to clear the lens, will have to
see how it goes after some controuring
Aug 25 2hr
Couple more hours working on the plugs. Sanded down speaker boxes
down to smooth finish, they should be ready for pulling molds from,
however found that one of them has couple small depressions on the
face of the mounting face of the speakers and one of them looks like
its right on the mounting point so dont want to take a chance so it
will need to be fixed. Though forgot to do that and will need to
wait till next time. Sanded down HVAC and put heavy coat of
primer on it, hopefully it will be ready to sand down next day as
its rather hot last few days. Carved out recess on the storage box
panel rest area and build up around window opening and filled in
sides as help to help of mounting flanging. Trimmed HID headlight
housings by adding 3/4 inch on inside. The extra space makes a world
of difference thou it does not look like much. Have to add extra
filler in the left as it was carved out too much on angle.
Aug 26 0
a very short time out to garage after family day outing. Did a quick fill of the
speaker voids and build up rest of the upper panel's parting support
and skimmed HVAC fan box
Aug 30 0.5hr
sanded down HVAC and had it primed ones. Same with speaker
box, quick fill
Sep 1 0.5hr
sanded down HVAC and skimmed, Sanded down rear upper trim panel and
gave a light coat of primer
Sep 4 3.5 hr
Saturday so another yard work day making day short for play. Had to
do some maintenance work on daily driver but still squeezed some
time to work on the plugs.
Got the speaker box mount surface fixed and finished, knocked down
all sharp corners for easier mold and part making. Not sure it is
going to be wrapped or be just plain part as it will sit behind
cover panel though it would look better (finished) when its covered.
So speaker boxes plugs are done.
Sanded down back firewall panel and put heavy primer on the parting
and around window. one thing its still waiting on are the seat belts
loop mounts not sure how they will fit and work so will need to
wait. last thing to do will be to get the window area opening
rounded off and the panel plug is virtually ready as well. Trimmed
off left HID housing finally, it fits so much better now. will have
to get them to shape at least outer part and get the fenders done
and remade as that will be a huge move forward.
Exended upper lid of LED left housing as it was short and low so
that can be worked on as well
Sep 19 0.5hr
Added returns onto rear firewall panel
Sep 26 1hr
Been busy with other things around the house so did not much time to
work on the car, yah \ok lame excuse. Anyway was working on daily
driver today again to prep it for winter and in between squeezed
some time. So added bit of a build up with some old short strand
around the headlights trying to get it to lift up and add some extra
clearance for the housings. Will have to knock it down but its at
point that it has fair amount where some of the underside of the
fender can be ground down . Will have to fill in any of the rough
surface and smooth it out.
Sep 30 4hr
Believe cluster power board maybe fully routed. It has all regulator
circuits for cluster and GPS/Communication modules and power
monitoring and switching logic to regulators on board. Will have to
run simulations on them all before producing the boards and any
assembly.
Oct 2 0.5hr
did not had too much of free time but working on daily driver ground
and sanded overflow and high spots on the fenders around headlights.
Really need to get them shaped and adjust other small areas and have
new molds made and remake the fenders
Oct8 (2hr)
Forgot the pain in the rear of driving across town. Went out to get
a pail of resin to start laying up molds for the plugs. Need to have
them finished before cold sets in
Oct 9 3hr
With all of the plugs lying around and getting late in the summer,
not wanting to crack any of them picked up pail of resin on friday
to make up all of the molds, even if they are just going to be
sitting on the plugs. Unfortunately they will have to be made in
break away pieces most likely into 3 different parts due to odd
contours. Will leave the upper rear panel alone for the time being
though probably would not be a bad idea to have it made. However
with 2 HVAC boxes and 2 speaker boxes and 5 other non related pieces
it will be busy day so decided to leave that panel alone for time
being as it will be crowded in garage. Will try pulling it once
other pieces are done and out of the way. Got everything parted
waxed. Once PVA dries over night will fiber glass them in the morning
Oct 10 4hr
So got out to get all of the parts glassed. As always had to cut a
lot of fabric as had to make 9 parts and in reality it took 7 hours
from start to finish but approximated to 4. So now have speaker
boxes that will need additional half part to be made with additional
support after the fact that will be bonded on the inside. The 2 HVAC
boxes will need 2 additional external parts for the mold cause of
their shape. Will have to pull parting from them and move on to next
step next day out
Oct 11 2.hr
Did a first trim to get rid of the rough edge fibers. Will have to
wax and PVA after setting up parting on the speaker and HVAC
molds.
Oct 16 1.5hr
Been few days, figured the glass is cured so got out parted HVAC
boxes waxed and PVA for tomorrow including speaker boxes.
Speaker boxes will need 3rd piece as well but they will be made as
separate pull after adjusting the plugs.
Oct 17 2 hr
continued on with the molds. Had to cut some extra mat and laid up
second parts for the 2 HVAC boxes and right speaker box.
Unfortunately run out of resin for the left box and probably its not
thick enough in one corner for the right one. Need to get another
pail to lay up the last parts for HVAC and left speaker box.
Will try to make parts this hear so that they can be fitted in and
mounting made during cooler temperatures
Oct 22 (2hr)
Another trip across town for pail of resin. while there picked up
quart of bonding putty, seen it last time so will try to see how it
works bonding brake splitters and forming PCB guides. Well at least
that's the hopes of it. If it works OK will try it on bonding door
skins to the inner panels and hood. Could be lower cost alternative
to 3M epoxy
Oct 23 4hr
Should had been shorter visit however as the molds where not
stripped of previous parting so had to remove those first. Not sure
but the longer curing time may had allowed separation of the parting
material to be much easier then just with just 24hr wait. Will wait
longer with next molds/parts.
Never the less parted last pieces for HVAC boxes leaving tops open
as that will be only way of laing up the parts and tops will have
opening so then can be made at later time. Also was going to make
mold of the upper rear firewall in one part though possibly leaning
to wards 2. Last minute decided to make it into 3 parts so that took
some time to make as it is large part.
Waxed and PVA all of the plugs for next day to lay up some glass on.
Oct 24 5hr
laid up last parts of HVAC boxes and second part of left speaker
box. Also a main part of rear upper firewall panel is done as well.
Two more small parts are next and will be able to pull parts from
it.
Speaker boxes plugs will need to be trimmed and fixed around one of
the edges to make up a mounting/ resting corner that will need to be
bonded in as after the fact.
Drilled and trimmed right speaker box and had it split. Will
fix the plug for 3rd part together with the left box.
Laid heavy layer of filler on fenders to blend in the raised
headlight opening. Will have it sanded and further filled in to
contour.
Will have to do something with fenders and bumper to get it flow
properly as it has bit of a bump to it now that the lights are
sunked in lower into the bumper
Oct 25 0.5hr
Sanded down some of the fenders filler to see how much more work it
needs
Oct 27 5hr
Bit longer day then normal but lots of different things got
accomplished. To start with all the molds where trimmed
drilled. Any parting on back firewall was ripped and relocated to
other areas to extend part lay up. Got it waxed but did not PVA so
will see how that will work with separation of mold panels.
All the mold's will need to have second look as normal before making
parts and should do that ASAP to the parts can be laid up though it
might be good idea to have them cure and settle for couple of days.
Got the speaker boxes trimmed and filled in some chips and back side
so that the extra mount pieces molds can be made in the next couple
of days
Oct 28 1hr
Laid up window surround return however used brush technique to
apply resin into the mat.
Couple observations from the process. Its a lot slower then doing it
by hand, possibly uses more resin during the process. .... Oh did I
say its a lot slower. On positive side. its possible to brush fibers
smoother
Oct 31 4.5hr
Laid up bottom return on rear firewall panel, will let it sit for
couple of days before trimming and getting the molds ready for
making part. Sanded down speaker boxes plugs and primed , however
will have to skim it again to fill in couple small indentations not
that it would show bit I would know that they are not done properly.
Thou thinking about it they can be sanded down on the molds to have
it corrected. Cleaned up all molds for HVAC and speaker boxes,
unfortunetaly will have to fill in couple spots as the it looks like
the mat pulled off around corners. Also it ssems there was bubbles
in some spots of the mat was not saturated enough. SO.... I think
its best if those spots get corrected before making parts, extra
couple hours but it will be worth while.
To mix things up worked more on fenders surrounding headlight
openings and trying to get them raised and into shape and also
around hinge indents getting them smoothed out.
Should get the sill returns part of fenders extended, not sure if it
was miscalculation in having them trimmed or bolt holes in fenders
or door hinges or just combination of all above. Never the less need
to get them extended and box made around the hinge it self. So will
try to do that in the next couple of days.
Nov 2 2hr
now that couple days had passed and the firewall panel had time to
setup went out trimmed all the loose left overs drilled and pulled
molds from the plug. Not sure what had happened but there was couple
dry spots on the main and around window return that will have to be
filled up and sanded down before making part. While at it, touched
up HVAC and speaker boxes molds. However with fall coming faster
then expected temperatures are cooler so the curing starting to
extend so will have to wait till next day. Last thing for the day
decided to fill in some of the spots in speaker boxes as it will be
easier and faster to have it corrected this way then doing after the
fact. Not sure if it will be best to make just the parts or molds
and pull parts out. Either way its getting late in year and like to
have the parts made so will be able to have mounts made over the
winter time and any other mounts that are still missing.
Nov 6 4.5 hr
Been busy last couple of days, however got out today and made some
progress on the molds and got them ready for part making. Got all of
the goop and filler sanded down from pulling them from the plug. All
of the fillings got sanded including speaker boxes plugs to pull mol
for reinforcing ribs. All of them are waxed and PVA. Providing will
have enough resin then all of the HVAC, speaker boxes and rear
firewall upper panel will be make next day. Will have to do the
speaker and storage cover most likely next year.
Sanded down left fender and hinge packets. Will have to dust it off
and prime it to see if there are any spots that will need to be
fixed. Lastly ground down inner sill returns so will have to make up
recesses and extensions and have them glassed in before bonding to
the fenders.
Nov 7 4.5hr
seasonal wormer day so got out to garage for few hours. Assembled
all molds together and laid up speaker boxes and firewall cover
panel. Running low on resin but should had laid up last mold from
speaker box. May be will do that next day and assemble the speaker
boxes
Nov 10 .5hr
Split up the parts from the molds and though did not used any gel o
those they actually came out not too bad. Couple spots will need to
be fixed and sanded down but over all they are good and after they
are covered the gel coat will not make any difference. They are only
3 layers of 15oz with extra layer o2 around mounting holes, seem to
be strong opposed to thicker ones and are light especially
unexpectingly rear cover panel
Nov 13 2hr
Had been cooling down over last week but decided to grin and bear it
and get last parts done. Did not bothered to pick up extra resin so
was bit hesitant on making any as it would not had enough.
Surprisingly laid up the 2 HVAC boxes and supports for speaker
boxes. not sure if should just use the parts or pull parts for the
supports. Would have to get more resin as it was just used last
ounce on them
Pail of resin might be bit much if only used few onces and not sure
how it would hold over winder. Might be able to six fenders or
possibly pull molds but would require a lot of work on them still
and that might be pushing into december. So may just concentrate on
what is made have it trimmed and fitted and maybe do some work on
the doors like window regulators and latches
Jan 3 2022
No excuses as could have put more time into the project and only
moderate 236 hours where spent on the project
2020 may have looked unproductive as a lot could had been completed,
though it was a very good year overall with only 216 hours applied to
the project which gave a very good start to other things that can be
worked on and hopefully completed this year. A lot of the time was
applied to the interior plugs from which parts where pulled. Some
work still is pending to have them finished but they are nearly
ready with few more to go next year.
..... so on to the next year and hopefully closer to have it
finished
Total
1498.
hr